Disclosure: This Disney face mask page contains affiliate links. Read full Disclosure Policy.
In this simple Disney Cricut tutorial, I’ll show you how to create a cute Disney face mask using one of Cricut’s free Design Space walk-throughs.
But first…
Watch this Short Cricut Face Mask Tutorial
Run time is approximately 6 minutes.
Cricut has generously provided 4 FREE face mask patterns for your use! These ready-to-make projects are available in Cricut Design Space.

If you have a Cricut Maker, your machine can cut the fabric for you and all you have to do is sew it together.
If you have a different Cricut machine, you can cut the pattern pieces onto cardstock using your Cricut and then trace them onto fabric.
Let’s begin with an official disclosure from Cricut about the masks:
Caution – This mask is NOT rated for disease control. The Center for Disease Control (CDC) has provided the following information regarding homemade face masks: The role of face-masks is for patient source control, to reduce contamination of the surrounding area when a person coughs or sneezes. Patients with confirmed or suspected illness should wear a facemask until they are isolated in a hospital or at home. Most facemasks do not effectively filter small particles from the air and do not prevent leakage around the edge of the mask when the user inhales.* When professional facemasks are not available, healthcare personnel might use homemade masks for care of patients with COVID-19 as a last resort. However, caution should be exercised when considering this option since their capability to protect healthcare personnel is unknown.
Cricut
So, in a nutshell – these are NOT hospital-grade masks.
However, if you or a loved one is sick with a contagious illness, they could be helpful when worn by the sick individual to reduce the spread of the disease.
On a personal note: I tried to keep a child-sized disposable mask on my 3-year-old who had the flu a few months ago and it did not go well. But I believe I will have different results with a custom mask featuring the licensed Disney fabric of her choosing! I’m hoping that by #stayinghome we won’t have to find out. But I’m sewing a couple of these for my kids, just in case.

Free DIY Face Mask Cricut Patterns
Now, which mask to make? Cricut has 4 pattern options of different sizes. Each project can be edited in Design Space before cutting. I have listed them here from largest to smallest.

You can click the name of the Pattern below to open the project in Design Space.
- Large Adult Face Mask – approx. 11” x 6.5” finished size
- Small/Medium Adult Face Mask – approx. 10” x 6” finished size
- Youth Face Mask – approx. 9.5” x 5.5” finished size
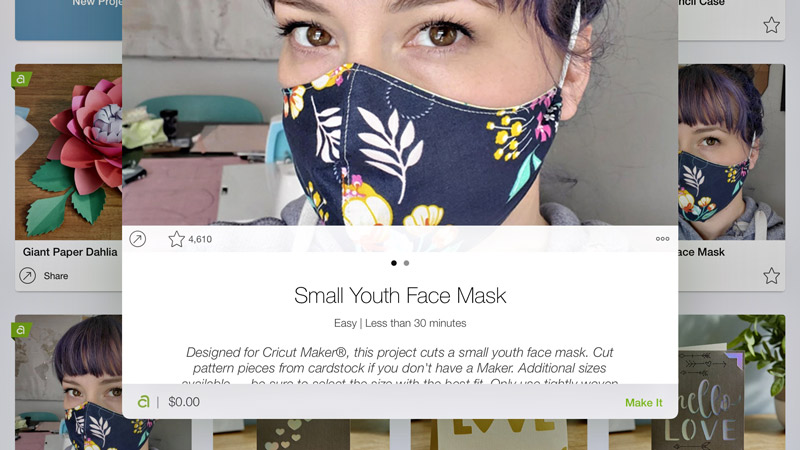
- Small Youth Face Mask – approx. 8.5” x 5” finished size
As you can see, the sizes vary by approx. ½” between sizes.
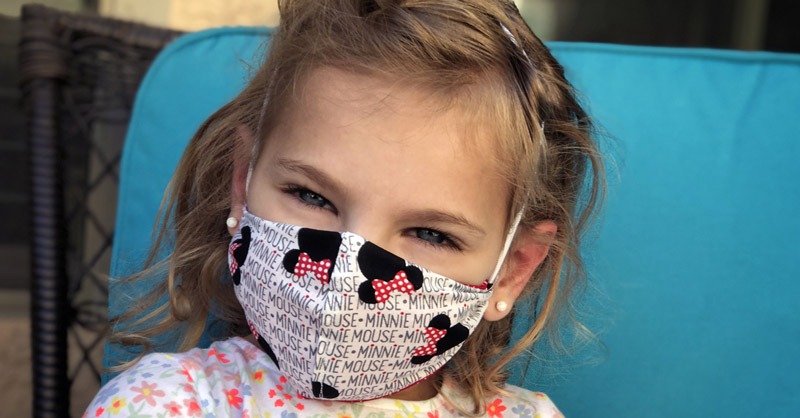
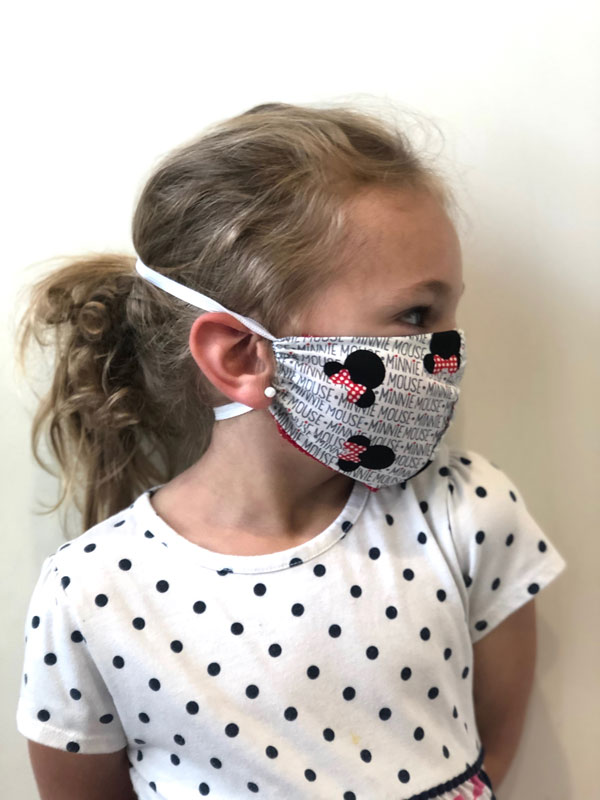
For your reference, I made the Small Youth size and it fit my 3 year old. For any older kids, I would do the Youth. And I’d do the Small/Medium Adult size for most teenagers.
Getting Started
You’ll need the following supplies and accessories:
- Cricut Maker or Explore Machine
- Sewing Machine
- Cricut EasyPress Mini (or household iron)
- Ironing board or teflon sheet
- 2 different colors of 100% cotton or cotton/poly blend Disney fabric (prewashed, ironed, and cut to fit onto mat)
- NOTE: Size of fabric needed will vary depending on which pattern you select.
- ⅛”-¼” Braided Elastic
- NOTE: If you can’t find elastic, you can use thin ribbon instead. Double the suggested length of elastic if you’re using ribbon.
For a Youth Mask, you will use approx. 17”.
For a S/M Adult Mask, you will use approx. 18”.
For a Large Adult Mask, you will use approx. 20”.
- FabricGrip Machine Mat
- Cricut Washable Fabric Pen
- Rotary blade
- Fabric scissors
- Small safety pin
- Brayer
- Sewing pins or fabric clips (optional)
Skill level: Beginner
Time Estimate: 30 minutes
Customize a Face Mask Pattern for Cricut
1. Click one of the links above to open your selected size facemask pattern in Cricut Design Space.
2. Click MAKE IT at the bottom right of your screen.
3. The dark blue mat shown will be your OUTER fabric pattern piece. The light blue mat is designed to be the INNER fabric (against your skin).
4. If you want to mix and match fabrics, you can drag them onto other mats, as desired.
Cut Your Cricut Face Mask Pattern
- Turn your Cricut Maker on.
- Click CONTINUE at the bottom right of the screen.
- Choose COTTON for your MATERIAL.
- Load your WASHABLE FABRIC PEN and ROTARY BLADE into your machine and verify they are loaded correctly.
- Place your FABRIC onto your mat (right side down), with the grain running lengthwise on the cutting mat. Use your BRAYER to smooth the fabric on your mat.
- NOTE: In the video, I accidentally cut my fabric right side up. Oops! No harm no foul!

- Load your first MAT (which will be the LINER fabric unless you changed the mat order).
- Press the GO button on your Cricut Maker.
- Watch the magic happen!
- When the Maker is finished and the Load/Unload button blinks, UNLOAD your mat.
- Repeat STEPS 5-9 for your second layer of fabric.
Make Your Homemade Face Mask
- Match up your OUTER LAYER fabric pieces, right sides together. Pin if necessary.
- Sew along the long, curved edge, with a ¼” seam allowance.
- NOTE: The seam allowance has been marked for you by the Washable Fabric Pen).
- Snip along the curve you just sewed, being careful not to cut through the stitching.

- Iron the seam to one side. I recommend using the EasyPress Mini for this, if you have it… it’s the perfect size!
- Top stitch along the seam.
- Repeat Steps 1-5 with the LINER fabric pieces.
- Fold and iron the straight, outside edges of the LINER down, about ¼”. Stitch close to the edge.
- Fold and iron the straight, outside edges of the OUTER LAYER down, about ¼”. Optionally, you can stitch this down close to the edge. Next, fold the outer edges over again ½” and iron.

- Stitch as close to this fold as possible, to create a casing wide enough for the elastic.
- Align the OUTER and LINER pieces, right sides together. Pin or clip if necessary.
- Sew along the top and bottom edges with a ¼” seam allowance. Do NOT sew the sides together.
- Snip along the curve and trim as necessary.
- Turn the mask right side out, through one of the side openings. Iron the seams.
- Top stitch along the top and bottom seams, if desired. This will create a more crisp, finished-looking edge, but is not necessary.
- Using a small safety pin, thread the elastic through the bottom of one side of the mask, and continue through the top of the other side. Your elastic will form a circle.

- Make sure the elastic can lay flat and is not twisted. Then connect both ends with a zigzag stitch.
- NOTE: If using ribbon instead of elastic, do not stitch the ends together. Instead, place the mask on your face, tie it comfortably, and trim the ribbon as necessary. After removing it from your head, burn the ends carefully with a lighter to prevent fraying. You will tie it on each time you wear it.
- Slide the stitch part of the elastic into one of the fabric casings. You did it!
- Optionally, you can slide a filter through the side opening between the layers.
Love Your Cricut Maker Face Mask
If you made your mask out of cotton, you can clean it in your washing machine!

We hope that by creating a mask (or masks) for yourself or your family, you will feel a sense of peace and preparedness in the midst of so much panic. Enjoy your Cricut Maker face mask!
As always, we would love to see your Disney crafts projects. You can share them with us using #picturethemagic.
Please stay safe and healthy!
Have you tried adapting this pattern to ties instead of elastic since elastic has become difficult to impossible to find?
No, but that is a great idea!
Updated the post with a suggestion if you don’t have elastic.
So I have some Single fat quarters. some are 100% cotton and others are Premium Quilting Flannel 100% cotton, If i use the Premium Quilting Flannel on the outside so you think that would be ok?
Thank you
Is there a way I could print the pattern, I don’t have a cricut.