This is a sponsored conversation written by me on behalf of Cricut. The opinions and text are all mine.
Disclosure: This Cricut EasyPress Mini post contains affiliate links. Read full Disclosure Policy.
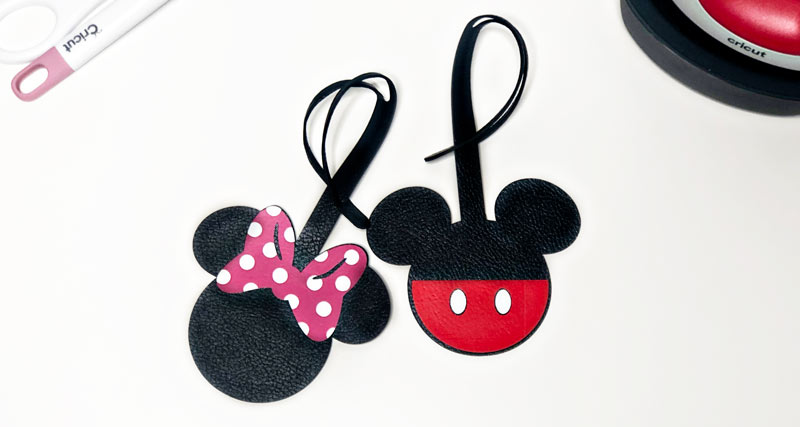
My daughter got an adorable Disney suitcase for her birthday, and I decided that our generic luggage tags just wouldn’t cut it.
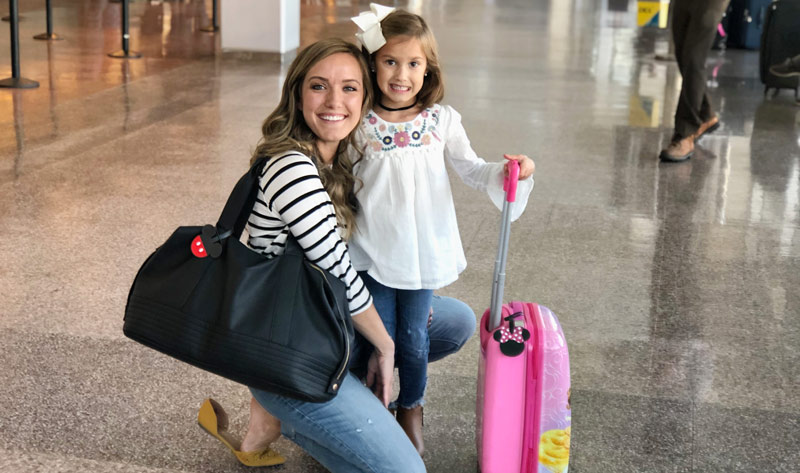
So, like any crafty, Disney-obsessed mama, I made her a luggage tag! And of course, I wanted to match my little travel buddy, so I made myself one too!
It was SO easy, and turned out SO cute! And I cannot wait to teach you how to make your own Faux Leather Luggage Tags using the Cricut Maker and the brand new Cricut EasyPress Mini!
Faux Leather is one of my very favorite Cricut accessories to use with my machine.
Note: these Cricut instructions will work to make any set of leather luggage tags (not just Disney).
HERE’S A SHORTCUT:
I’ve even found a way to link you right to the project so you don’t have to redo all my design work. You can simply customize the finished project!
Just click the button below (must have Cricut Design Space login):
If you’re brand new to working with Iron-On vinyl, check out THIS TUTORIAL where I teach you how to make a custom t-shirt and teach you everything you need to know about Iron-On!
Want to know more about the EasyPress Mini? I’ve got you covered in THIS post. Consider it your go-to guide for the cutest heat press on the market!
Let’s jump right in!

TABLE OF CONTENTS
GETTING STARTED
Supplies Needed:
- Cricut Maker
- Cricut Faux Leather
- Iron-On Vinyl
- HeatnBond Ultra Hold Iron-On Adhesive
- Light or Standard Grip Mat
- Strong Grip Mat
- Masking Tape or Painters Tape
- Scissors
- Weeding tool
- EasyPress Mini
- EasyPress 2
- EasyPress 2 Mat
- Cricut BrightPad (optional)
- Towel or teflon sheet (optional – if you don’t have an EasyPress 2 Mat)
Skill level: Intermediate
Time Estimate: 40-60 min
Video Overview: Watch This First!
Preparing Your Materials
- Cut 2 squares of Cricut Faux Leather to 12” x 12”.
- Cut 1 square of HeatnBond Ultra Hold Iron-On Adhesive to 11.5” x 11.5”.
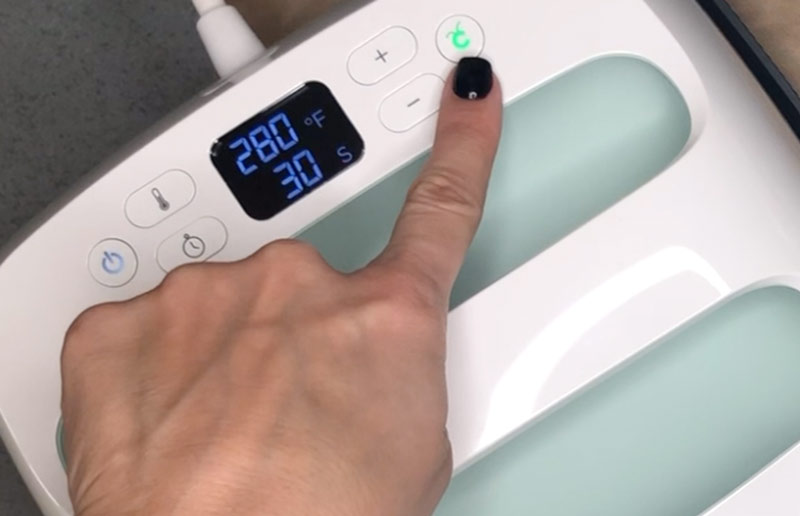
- Plug in your Cricut EasyPress 2 and turn it ON. Set the temperature to 280 degrees. The GO button will glow orange, showing you that the machine is preheating.
- Make sure your surface is firm and flat — NOT an ironing board or carpeted floor. Protect your surface with the EasyPress 2 mat (or a teflon sheet or towel).
- When your machine beeps and the GO button changes from orange to green, it is ready to use!
- Place on square of Faux Leather right side down on your surface. Position your square of HeatnBond on the wrong side of the Faux leather., and make sure the paper liner side is up… Check it… then double check it!
- Place the EasyPress 2 on top of your HeatnBond. Hold the EasyPress 2 in place for about 15 seconds. Apply firm pressure to the EasyPress 2 and hold it still while it does it’s job!
- TIP: If your design is bigger than your EasyPress 2, you may need to do this in sections.
- Wait a minute or so, until the liner is cool enough to handle and gently peel it back, away from the Adhesive and Vinyl.
- Place the second square of Faux Leather against the exposed HeatnBond (wrong side down).
- Place the EasyPress 2 on top of your Faux Leather. Hold the EasyPress 2 in place for about 15 seconds. Apply firm pressure. Do this in sections, if necessary!
- The bond may not feel very secure while the Iron-On Adhesive is still warm. To help the bond secure, you can place this leather/adhesive sandwich under something heavy (like a cookie sheet and books) while you move on until the next step. It should be one secure piece before you cut it!
Creating Your Design
- Click HERE to open our project template in Cricut Design Space on your browser.
- NOTE: This project contains 2 licensed images that are found within Cricut Design Space. You will be prompted to purchase them for a couple of dollars each, when you CUT your design.
- Adjust the SIZE or COLOR of any layers, if you like.
- EDIT YOUR TEXT.
- Double click the NAME text to open a text box.
- Edit the NAME.
- Double click the NUMBER text to open a text box.
- Edit the NUMBER.
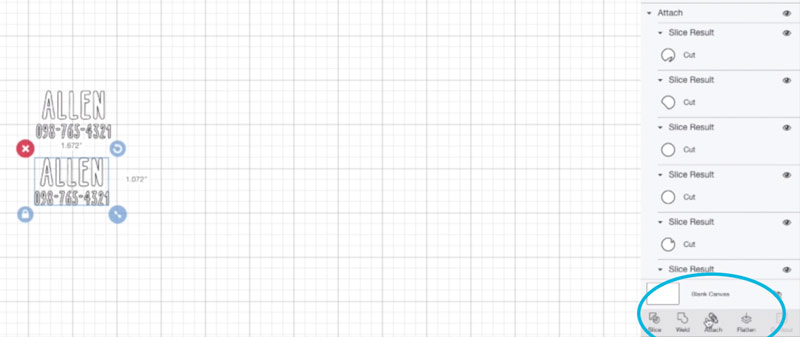
- Select both layers and ALIGN them HORIZONTALLY.
- With both layers still selected, DUPLICATE them.
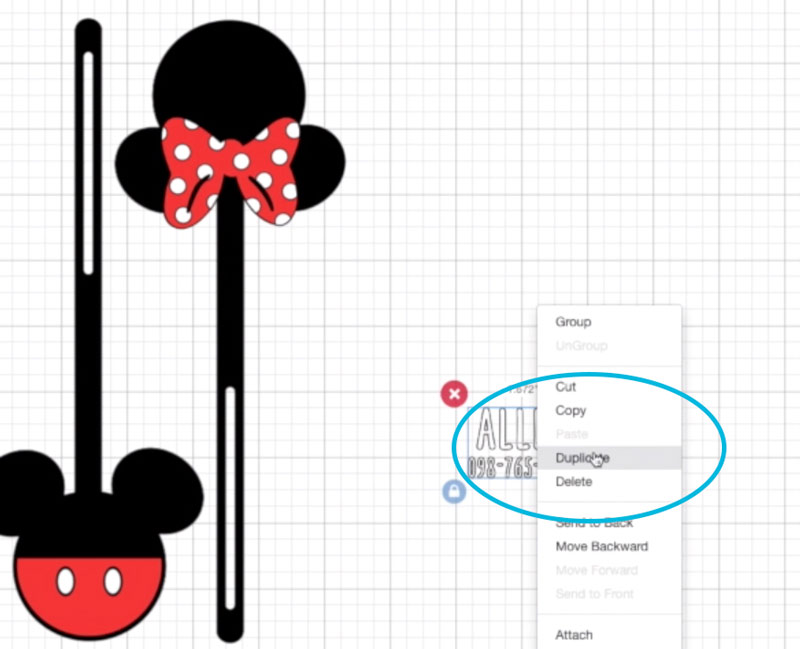
- Next, ATTACH your text layers.
Cutting Your Design
- Place your Iron-On vinyl and Faux leather onto your mat, aligning it with the grid. The glossy side of the vinyl goes DOWN.
- Tape down your Faux Leather on all 4 sides.

- Make sure your Fine Point Blade is in the machine.
- Turn your Cricut Maker on.
- Load your first mat (The cut-out arrow goes in first).
- Click MAKE IT at the top right of your screen.
- CHECK the “MIRROR” option. (Iron-On and Faux leather are cut on the wrong side of the vinyl so it will look correct when adhered to your material).
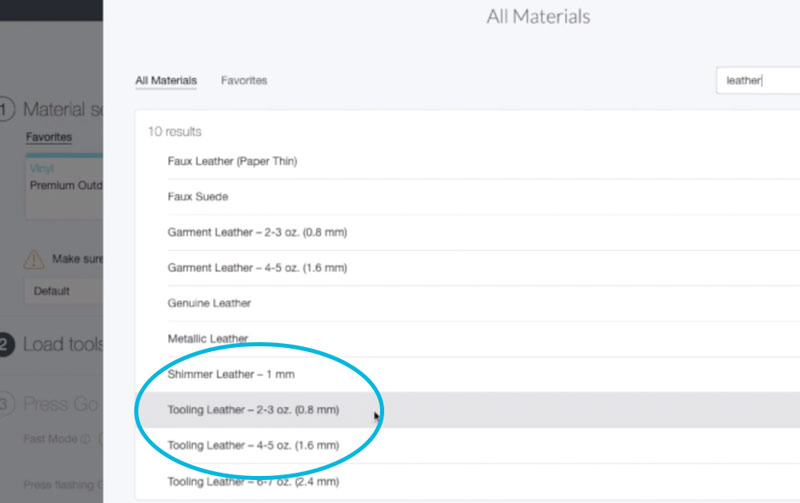
- Choose EVERYDAY IRON-ON for your MATERIAL for your vinyl layers and TOOLING LEATHER 2-3oz (.8mm) for your MATERIAL for your leather layer.
- NOTE: You will have to adjust this one at a time, just before each mat is cut. So be prepared to jump back on your computer mid-cutting…
- Verify your blade and mat are loaded correctly.
- Press the GO button on your Cricut Maker.
- Watch the magic happen!
- When the Maker is finished and the Load/Unload button blinks, UNLOAD your mat. Adjust your MATERIAL if needed, load your next mat, and continue until all your layers have been cut!
- Check the leather BEFORE removing the mat to make sure the cut went all the way through. If necessary, repeat the cut by pressing the GO button. If the cut is good, remove the mat and continue.
Applying Your Design
- Use your Weeder tool and scissors to remove the vinyl that is not part of your design.
- TIP: the Cricut Bright Pad makes seeing delicate cut lines SO easy!
- Plug in your Cricut EasyPress Mini and turn it ON. Pressing the power button once will set your EasyPress Mini to LOW, which is what you want. The power button and temperature indicator will glow orange, showing you that the machine is preheating.

- Make sure your surface is firm and flat — NOT and ironing board or carpeted floor. Protect your surface with the EasyPress 2 mat (or a teflon sheet or towel, if you do not have one).
- When your machine beeps and the GO button changes from orange to green, it is ready to use!
- Preheat your leather for 5 seconds! This step is super important!
- Position your vinyl design where you want it to go on your luggage tag, and make sure the shiny liner side is up… Check it… then double check it!
- Place the EasyPress Mini on top of your vinyl. Set a timer for 10 seconds. Apply gentle pressure to the EasyPress Mini and move it gently and slowly while it does it’s job!

- Depending on your choice of Iron-On Vinyl, you will need to remove the liner when it is warm or cold. Check our chart to make sure you do it correctly!
- Wait a minute or so, until the liner is cool enough to handle (and the proper temperature for removal) and gently peel it back, away from the earring.
- TIP: If the liner doesn’t lift easily, reheat the design for a few seconds and try again.
- For designs with multiple layers of vinyl (like the Minnie bow and dots), apply the dots AFTER applying the red bow and removing the liner. Make sure all previously applied vinyl is covered by heat-protecting liner, so it doesn’t melt.
- Apply the vinyl with your name and number on the back side of the tag using the same process.
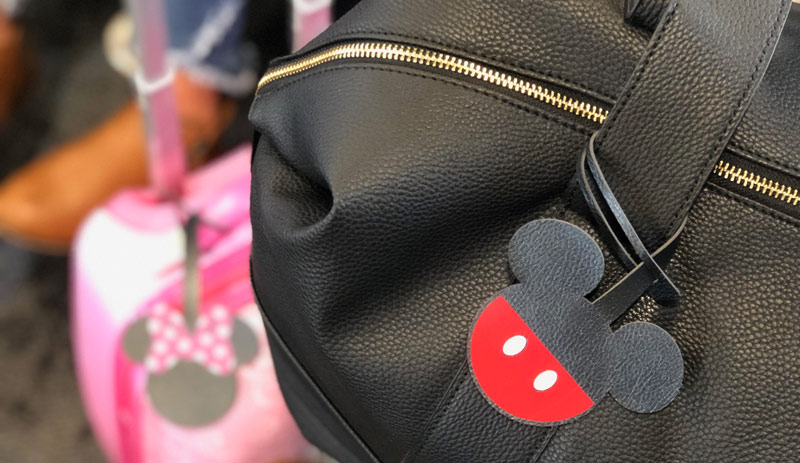
- ENJOY your creation!
We cannot wait to see the luggage tags you make! Share your design with us using #picturethemagic for a chance to be featured on our Instagram!
If you’re looking for Disney craft projects you can do WITH the kids, see my full list here.
Pin for Later
New to Cricut. Thanks for the tutorial. Looks like a good travel bag you have there – spacious with a wide opening. What bag is that?
Is it possible to cut the faux leather before binding to 2nd layer? Trying to figure out a way to create this using an explore air 2 (vs maker)